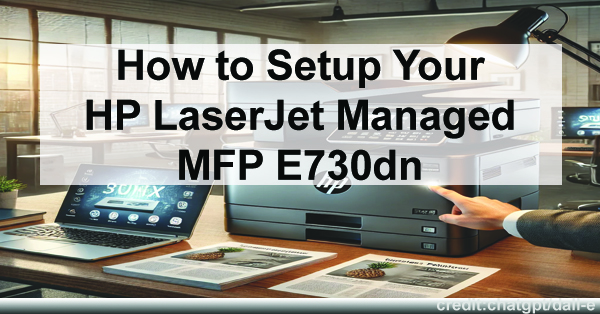
How to Setup Your HP LaserJet Managed MFP E730dn
The HP LaserJet Managed MFP E730dn is a versatile and powerful device designed to meet the demands of modern businesses. Whether you’re setting up this multifunction printer (MFP) in a small office or a large enterprise, understanding the initial setup process is crucial for ensuring smooth and efficient operations.
As you are setting up your new device, we thought we’d help by addressing the top 10 setup questions that users commonly ask about the HP LaserJet Managed MFP E730dn.
This guide will help you get the most out of your new device while minimizing any potential issues during installation and configuration. As a side note, it’s important to remember that when you use ABT as your MFP vendor, we offer your team a personalized training session.
1. What Are the Basic Physical Setup Steps for the HP LaserJet Managed MFP E730dn?
Setting up the HP LaserJet Managed MFP E730dn physically is straightforward. Here’s a step-by-step guide:
- Unboxing: Start by carefully unboxing the printer. Remove all packaging materials, tapes, and protective coverings from the device.
- Placement: Choose a stable, well-ventilated location for the printer. Ensure that there’s enough space around the device for easy access and proper airflow.
- Connecting Cables: Plug in the power cord to the printer and then into a wall outlet. Connect the Ethernet cable if you’re setting up a wired network connection. If you plan to use a USB connection, plug the USB cable into the appropriate port on both the printer and your computer.
- Power On: Press the power button to turn on the printer. Allow it to go through its initialization process.
Once these steps are completed, your HP LaserJet Managed MFP E730dn is ready for software installation. Again, when you partner with ABT, our installation team will do this for you.
2. How Do I Install the Printer Software and Drivers?
The next critical step is installing the necessary software and drivers:
- Download the Software: Visit the HP Support website and navigate to the driver download section. Enter your printer model (E730dn) and download the latest drivers and software.
- Run the Installer: Open the downloaded file and follow the on-screen instructions. The installation wizard will guide you through the process, including selecting your connection type (USB, Ethernet, or Wi-Fi (definitions below)).
- Network Configuration: If connecting via Ethernet or Wi-Fi, you’ll need to configure the network settings. The software will automatically detect the printer and guide you through the steps to connect it to your network.
- Test Print: After installation, print a test page to confirm that the printer is working correctly.
How HP Cloud Services Propel CO SMBs Forward
3. How Do I Connect the HP LaserJet Managed MFP E730dn to a Wireless Network?
If you prefer a wireless setup, follow these steps:
- Access the Control Panel: On the printer’s touchscreen control panel, navigate to the “Network Setup” or “Wireless Setup Wizard.”
- Select Your Network: The printer will search for available wireless networks. Select your network from the list.
- Enter Password: Enter your Wi-Fi password using the on-screen keyboard. Ensure that the password is entered correctly to avoid connection issues.
- Confirm Connection: Once connected, the printer will display a confirmation message. You can also print a Network Configuration page to verify the connection details.
4. How Do I Configure Scan-to-Email on the HP LaserJet Managed MFP E730dn?
Scan-to-Email is a feature available on multifunction printers (MFPs) that allows users to scan a physical document and send it directly to an email address as an attachment. This process typically involves placing the document on the scanner, selecting the Scan-to-Email option on the printer’s control panel, entering the recipient’s email address, and sending the scan. The scanned document is usually converted into a PDF or image file before being attached to the email.
Scan-to-Email is a convenient way to share documents electronically without the need for a computer or additional software, streamlining workflows and reducing paper usage. It is especially useful in business environments where quick and efficient document sharing is essential. Here’s how to set it up:
- Access the Control Panel: Go to the printer’s home screen and select the “Scan” option.
- Set Up Email Address: Navigate to “Scan-to-Email Setup.” Enter the email address you wish to send the scans from (typically your office’s general email address) and the recipient’s email address.
- SMTP Server Settings: You’ll need to enter your email provider’s SMTP server settings (e.g., smtp.gmail.com for Gmail). You may also need to provide your email account’s login credentials.
- Test the Setup: After entering the necessary information, send a test email to ensure that the settings are correct.

5. How Do I Enable Duplex Printing (Automatic Two-Sided Printing)?
Duplex printing is an efficient way to save paper. The HP LaserJet Managed MFP E730dn supports automatic two-sided printing, and here’s how you can enable it:
- Printer Settings: On your computer, go to “Devices and Printers” in the Control Panel (Windows) or “Printers & Scanners” in System Preferences (Mac).
- Default Printing Preferences: Right-click on your printer and select “Printing Preferences.”
- Enable Duplex Printing: Look for the “Print on Both Sides” or “Duplex Printing” option and select “Automatic.” Click “OK” to save the changes.
Now, whenever you print a document, the printer will automatically print on both sides of the paper.
Examples of duplex printing jobs include:
- Double-Sided Reports: Printing business reports or project summaries with content on both sides of the page to save paper and reduce bulk.
- Booklets: Creating booklets or manuals where pages are printed on both sides and then folded or bound together.
- Brochures: Producing marketing brochures with information and graphics on both the front and back sides of each page.
- Invoices and Statements: Printing customer invoices or financial statements double-sided to consolidate information and cut down on mailing costs.
- Presentations: Generating handouts for presentations that feature slides on one side and notes or additional details on the reverse.
6. How Do I Set Up User Authentication and Access Control?
User authentication and walk-up access control on the HP LaserJet Managed MFP E730dn enhance security by ensuring only authorized personnel can access sensitive functions, like printing confidential documents.
These features also help manage costs by restricting resource usage, such as limiting color printing to specific departments, while providing accountability by tracking individual usage. Additionally, they allow for customized access, ensuring users have the necessary tools without overwhelming them, ultimately improving efficiency and protecting sensitive information.
If you need to restrict access to the printer or specific functions, you can set up user authentication and access control:
- Access the Embedded Web Server (EWS): Open a web browser on your computer and enter the printer’s IP address to access the EWS.
- Login Security: Go to the “Security” tab and set up administrator credentials if you haven’t already. This step is crucial for restricting access to the printer’s settings.
- User Access Control: Under the “Access Control” or “User Management” section, you can configure user roles and permissions. Assign specific functions (such as copying, scanning, or faxing) to different user groups.
- Authentication Methods: Choose your preferred authentication method, such as PIN codes, proximity cards, or user credentials.
7. How Do I Configure Network Settings Manually?
In some cases, you may need to configure the network settings manually, especially if your network uses static IP addresses:
- Access Network Settings: On the printer’s control panel, go to “Setup” > “Network Setup” > “TCP/IP Settings.”
- Set Static IP Address: Select “Manual IP” and enter the IP address, subnet mask, and default gateway provided by your network administrator.
- DNS Settings: Enter the primary and secondary DNS servers if required.
- Apply Changes: Save the settings and restart the printer. Your device should now be connected to the network with the manually configured IP address.

8. How Do I Install and Replace Toner Cartridges?
Toner management is essential for maintaining print quality and efficiency. Here’s how to install and replace toner cartridges:
- Open the Front Cover: Locate the front cover of the printer and open it to access the toner cartridge area.
- Remove the Old Cartridge: Gently pull the used toner cartridge out of the printer. Be careful not to spill any toner residue.
- Prepare the New Cartridge: Unpack the new toner cartridge and gently shake it from side to side to distribute the toner evenly. Remove any protective seals or covers.
- Insert the New Cartridge: Align the new cartridge with the guides inside the printer and slide it in until it clicks into place.
- Close the Cover: Close the front cover securely. The printer will automatically recognize the new cartridge.
Side Bar: What are Managed Print Services
Managed Print Services (MPS) play a crucial role in optimizing toner management for businesses using devices like the HP LaserJet Managed MFP E730dn. Through MPS, toner levels are monitored automatically, ensuring timely replenishment and reducing the risk of running out of supplies unexpectedly.
This proactive approach not only eliminates the hassle of manual ordering but also helps in maintaining consistent print quality by ensuring that genuine, high-quality toner is used. Additionally, MPS often includes usage analytics, which provide insights into toner consumption patterns, helping businesses to adjust their printing practices for better efficiency and cost savings.
By integrating toner management into a comprehensive MPS strategy, companies can significantly reduce waste, streamline operations, and maintain uninterrupted productivity.

9. How Do I Set Up and Use the Fax Functionality?
The HP LaserJet Managed MFP E730dn includes fax capabilities, and setting it up is easy:
- Connect the Phone Line: Plug the phone line into the fax port on the back of the printer.
- Configure Fax Settings: On the printer’s control panel, go to “Fax Setup” and configure your preferences, such as fax header, resolution, and dialing mode.
- Set Up Speed Dials: You can program frequently used fax numbers into speed dial buttons for quick access.
- Send a Fax: Load your document into the document feeder, select “Fax” on the control panel, enter the recipient’s fax number, and press “Start” to send the fax.
10. How Do I Perform Firmware Updates on the HP LaserJet Managed MFP E730dn?
Keeping your printer’s firmware up to date ensures optimal performance and access to the latest features:
- Check for Updates: On the printer’s control panel, navigate to “Setup” > “Service” > “LaserJet Update.”
- Download Updates: If an update is available, the printer will download and install it automatically. Make sure the printer is connected to the internet.
- Manual Update: You can also manually download the latest firmware from the HP Support website and install it via a USB drive.
- Restart the Printer: After the update is complete, restart the printer to apply the changes.
Unbox with Intention
Setting up the HP LaserJet Managed MFP E730dn may seem daunting at first, but by following these steps, you’ll have your printer up and running in no time. From connecting to a network to configuring advanced features like Scan-to-Email and user authentication, this guide covers the most common setup questions to ensure a smooth installation process.
Remember, each business environment is unique, and you may need to adjust these steps based on your specific needs. However, with this comprehensive guide, you’re well-equipped to handle the setup and start benefiting from the robust features of the HP LaserJet Managed MFP E730dn. Should you encounter any issues beyond these questions, HP’s customer support and online resources are always available to assist you.
This MFP is designed to enhance productivity, streamline workflows, and provide reliable performance, making it an excellent choice for businesses of all sizes. Enjoy your new HP LaserJet Managed MFP E730dn!
Definitions:
What is an MFP?
An MFP, or Multifunction Printer, is a device that combines multiple office functions into one machine, typically including printing, copying, scanning, and faxing capabilities. It’s designed to streamline workflows and save space by consolidating these functions into a single unit.
What is the difference between USB, Ethernet, and Wi-Fi connections lies in how they connect devices:
- USB: A direct, wired connection between a device (like a printer) and a computer, providing a reliable, single-user connection.
- Ethernet: A wired network connection that links devices (such as printers) to a network, allowing multiple users to access the device over the network.
- Wi-Fi: A wireless network connection that connects devices to a network without cables, offering flexibility and mobility but potentially less stability compared to wired connections.
What is a wireless setup?
Wireless setup refers to the process of connecting a device, like a printer, to a Wi-Fi network without using cables. This allows the device to communicate with other devices on the network wirelessly, offering convenience and flexibility in placement and use.
What is a firmware update?
A firmware update is a process that installs new software onto a device’s built-in hardware, such as a printer, to improve its performance, fix bugs, or add new features. Firmware is the low-level software that controls the device’s basic functions, and updating it ensures the device operates efficiently and stays compatible with the latest technologies and security standards.