Training Gallery
Watch How-To Videos and more.....Earum est voluptas quis labore fugiat.

Connect Like Never Before
Human connections are our greatest commodity. And we're here to make them easier. Let's connect like never before and say Hello to Possibilities.
Say Hello to Effortless Productivity
We bring together employees, customers, vendors, partners and everyone in between on one powerful app. Your teams can seamlessly message, call and meet over mobile, desktop, and even browsers.
Welcome to Simpler Communications
One place to do your best work. Bring everyone and everything together on RingCentral with message, video, and phone features.
How to use the RingCentral Mobile App
See how easy it is to manage your phone system anytime, anyplace with powerful features including voice, fax, video, text and more.

Crexendo VIP | Powering How You Work Today
Powerful but simple-to-use Video, Interactions, and Phone communications that will help your employees be more productive and improve your ability to delight your customers.
Crexendo VIP | 100% Uptime Guaranteed.
Keep your workflow efficient and productive. It's built on the fastest-growing cloud platform in the U.S., and is backed by Crexendo's industry-leading 100% Uptime Guarantee.
Crexendo VIP | Next-level video for optimal productivity.
CrexendoVIP Video improves team productivity with HD-quality one-to-one, group, and webinar-style meetings for up to 200 attendees
Crexendo VIP | Your business phone anywhere, on any device.
Crexendo VIP Phone lets you use the device of your choice for business communication, whether mobile, browser-based or traditional desk phone with HD Voice.
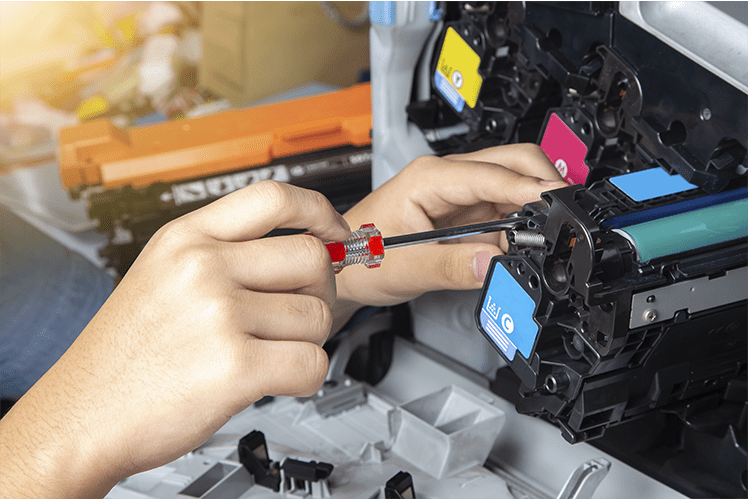
Troubleshooting Printer Repairs
For Ethernet users (who are not connected via USB), the first thing the help desk will ask you to check is your cable connection. Is the power cable correctly connected to your printer? If the power cable is correctly connected to your printer, you should be able to see a green light. If there are no lights at all, it’s a reasonable assumption that the cable, and therefore your printer, is not connected to anything at all. Ensure that your switch is live or the ports you are plugging into are live. You might also want to check your wireless feature. If your machine also has a wireless feature, disconnect your cable and turn on your wifi to see if this solves the problem. The power circuit might also be blown. Find your panel and the display of operational lights or listen for the motor or fan running. If your machine is indeed on, try rebooting the machine by holding down the power button for :15 seconds (or the time directed by your user manual).
If your configuration is not correct, on any network connected printer, you will not be able to print.
- Start by making sure you are on the same network as the printer you are investigating. In some cases a user may be connected to another office via a VPN (Virtual Private Network) and forget about this, and find they can’t print.
- Make sure your printer has an IP Address. You can check this on the printer, under the menu feature. Find the network setting and under ipv4, you can locate the IP address. Once it’s located, open your browser and type that into the URL address. If that page is found (it shows up), then you should be able to print.
If this is working, this is also an opportunity to change or check any other printer settings.
- If you can’t see this page, then you computer is likely not communicating with the printer. Check that the printer has an ethernet cable plugged into it, or that the wireless feature of the printer is turned on. In some cases, the wireless feature is turned off, even though the printer is on and active.
- And if that fails, powering the printer off and then back on can sometimes reset the network services and resolve the issue.
If you are getting paper and/or toner errors first check to be sure the printer is turned on and that the control panel can be used.
- Double check that there is adequate (even fully supplied) paper and toner in the machine. It seems like a no-brainer, but we’ve all speculated that the supplies were full when they weren’t, best to check.
- Still beeping? Make sure the drawer paper setting is a match to the paper size that you are printing. PDF files are notorious for upping the paper size. Sometimes, they render in abnormal sizes like 8.6 x 11.3 instead of normal 8.5 x 11 paper. Printers are easily confused. If this is the problem, you can change the paper size in your Word or PDF programs to get the optimum size.
Nothing hits the heart rate like blinking error lights and beeping malfunction indicators on the printer. The warnings differ a bit, printing manufacturer to printing manufacturer however, if you’re seeing abnormal colors or lights, or if your pages are printing in tongues (gibberish), this is more likely to be a misaligned print driver. You’ll want to start at your device manufacturer’s website where you can download a different print driver than the “Universal” print driver your device may have. Print drivers are basic, and really have limited functionality. If you can, try to use the print driver that is specific to the device model you have.
If your printer is on your network, has an IP address that is reachable by you, then it may be possible that your SNMP (Simple Network Management Protocol) setting is turned off. To turn it on, go to “Devices and Printers” and find the printer that is not working. Right click on the printer icon. Go to Printer Properties>Ports>Configure Port> and ake sure “SMNP Status Enabled” is checked. If it is not enabled, check the box, click “OK”, and apply. Once you have done this, return to the General Tab and click on “Print Test Page” and your printer should print out a confirmation test page.